Clawgs V3 Instructions
TIPS TO KEEP PAWS AND CLAWGS IN GOOD SHAPE:
Take things slow until you're confident Clawgs are properly adjusted on every paw.
Just because dogs are comfortable and capable of running in Clawgs almost instantly doesn't mean it's a good idea. Clawgs have tons of adjustability - 32 adjustment points on four Clawged dogs! It takes time to learn how to adjust them best for each of your pups' unique paws.
Start with leashed walks, frequent inspections, and make adjustments as needed.
It's normal for dogs to try to remove Clawgs when they have nothing else to do. Distract them with one of their favorite activities - Sniffing the neighborhood!
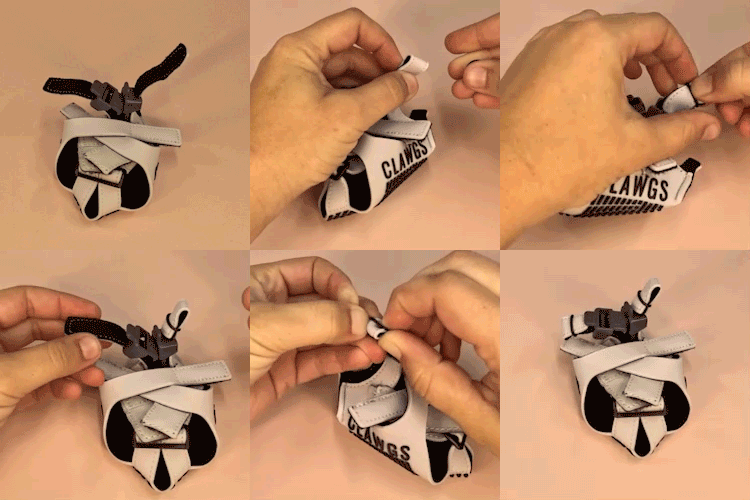
When dogs are lying around, remove Clawgs and store them in the included pouch.
Like us, dogs are more comfortable lounging and sleeping without anything on their feet. Let their dogs breathe!
Supervise dogs in Clawgs as much as possible, particularly at first.
Immediately stop dogs from biting Clawgs if you catch them in the act. If your dog damages their Clawgs, please contact us to see if we can repair them.
LABELED PAW & CLAWG:
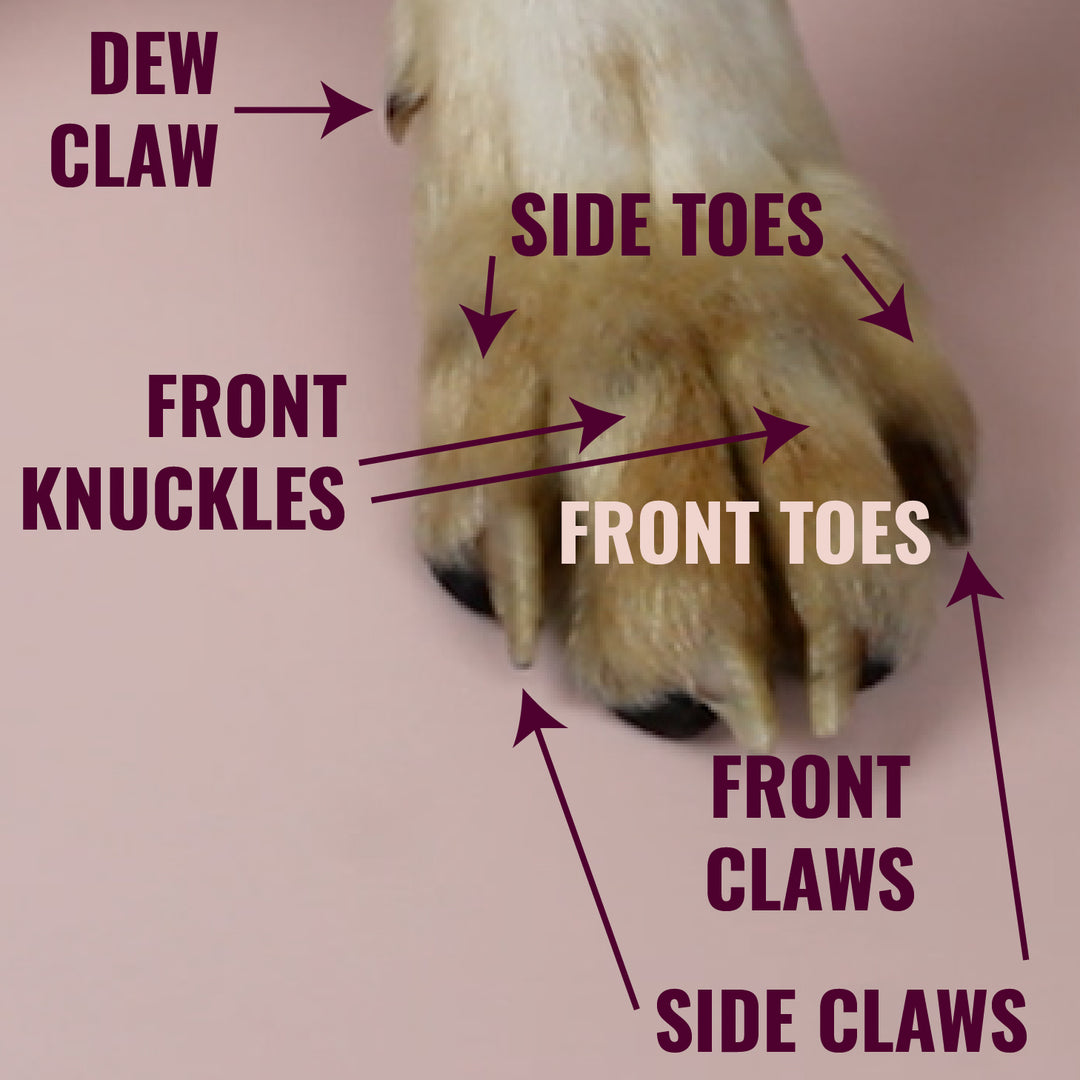
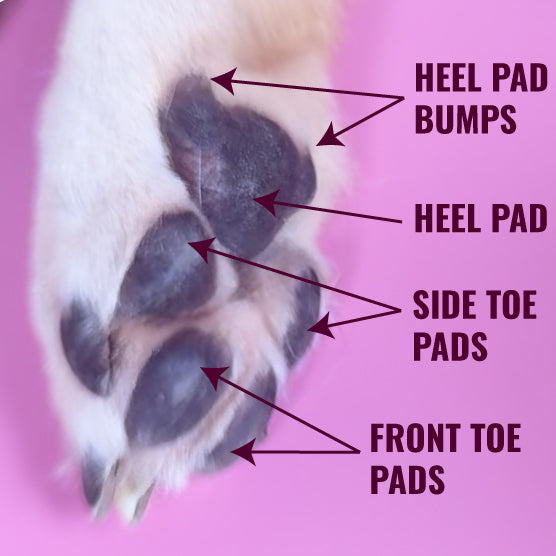
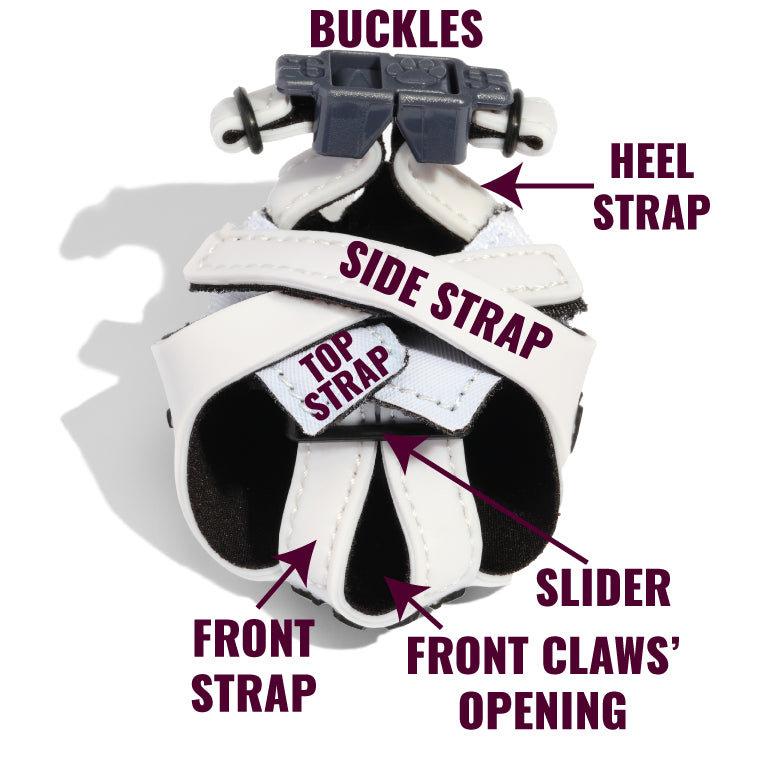
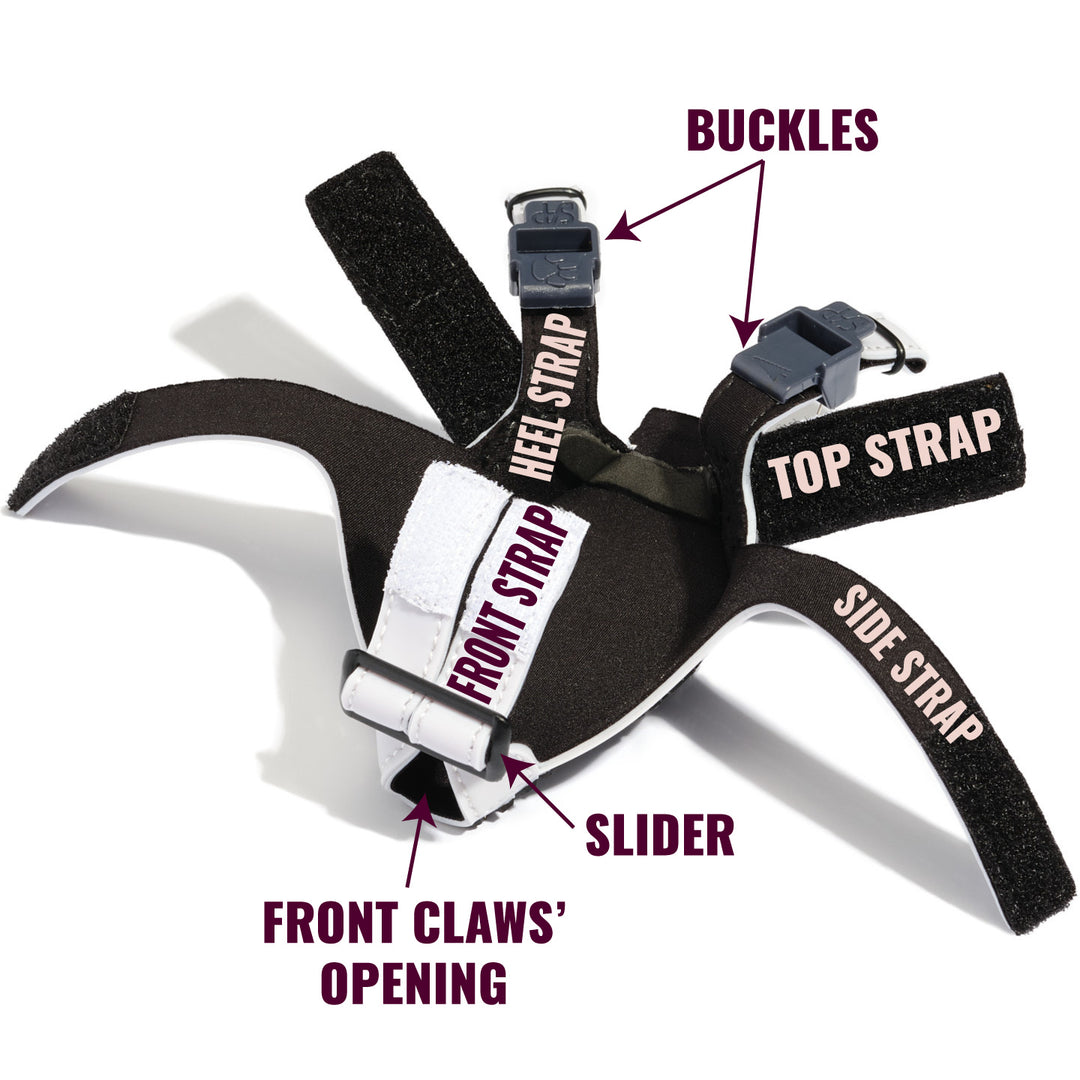
Please familiarize yourself with Clawgs V3 before attempting to put them on dogs.
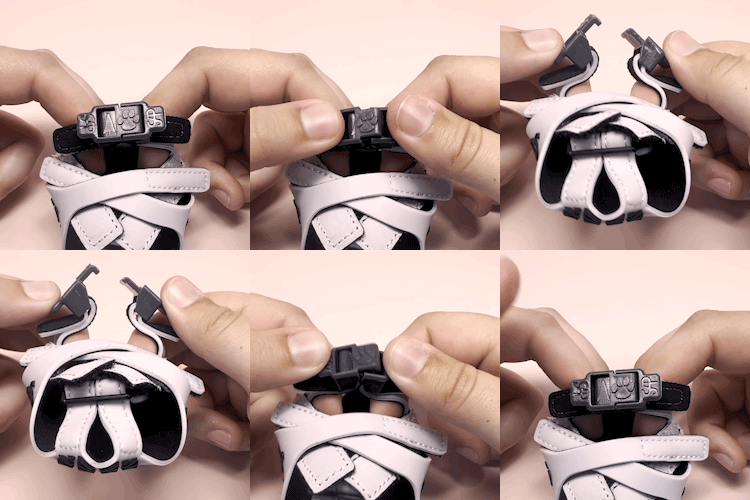
Fasten And Unfasten The Buckle
To unfasten the buckle, simultaneously press both buckle sides' finger tabs.
To fasten the buckle, insert the right buckle up and through the left buckle's opening.
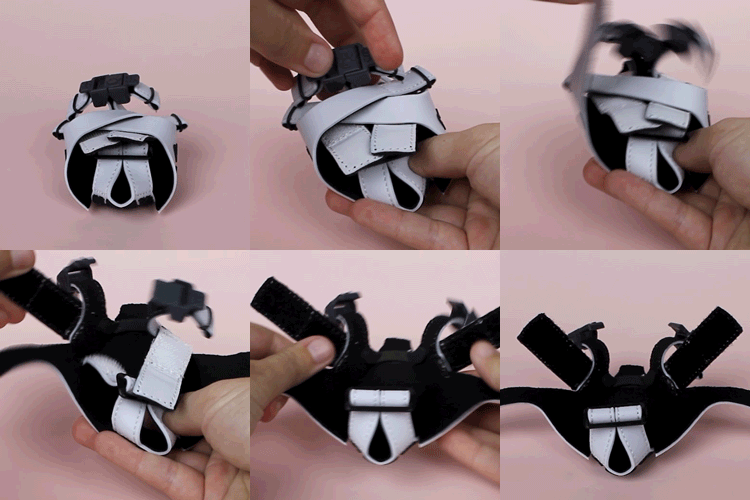
Unfasten The Four Velcro Toe Straps
Note that the front straps extend diagonally to attach to the top straps.
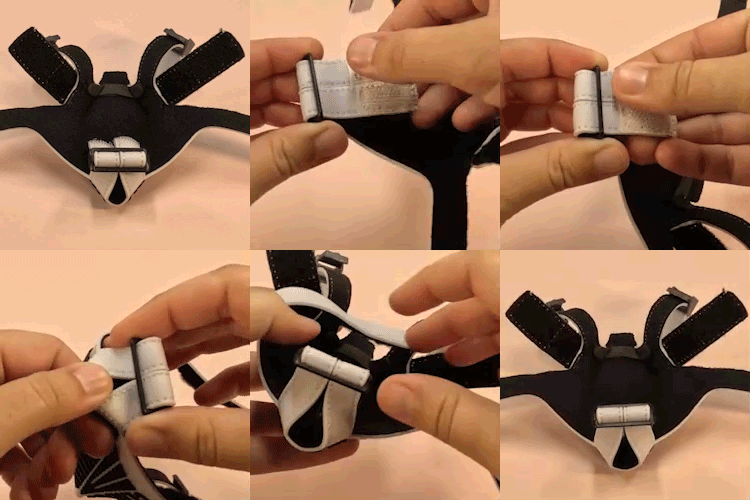
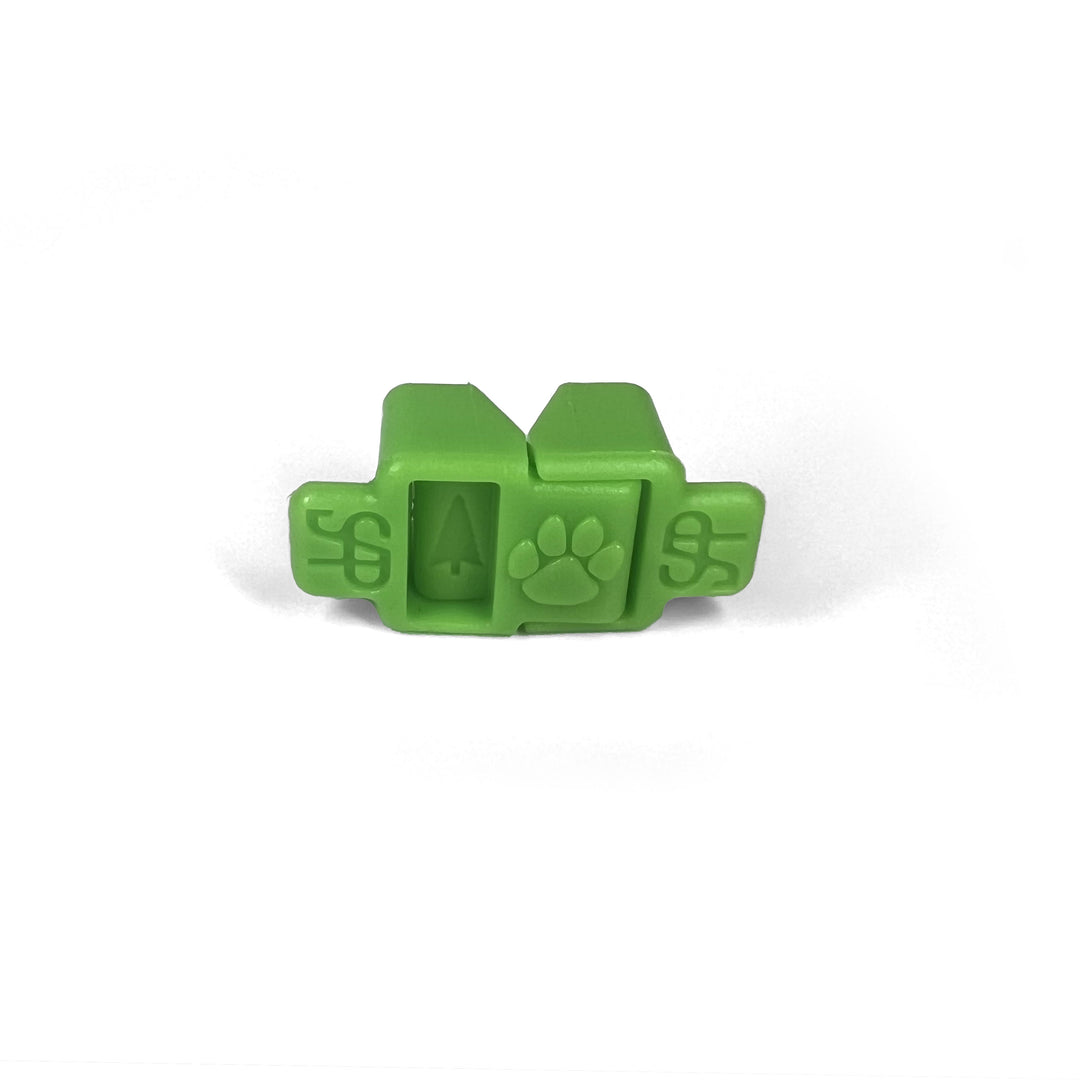
Raise And Lower Sliders
This changes the front claws' opening's diameter.
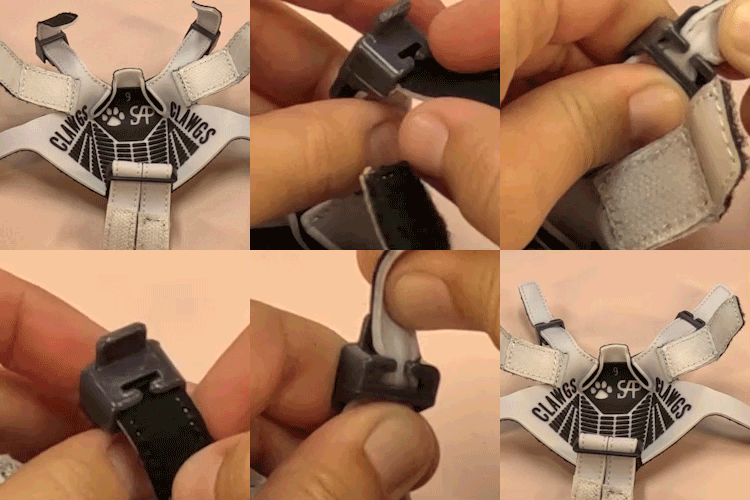
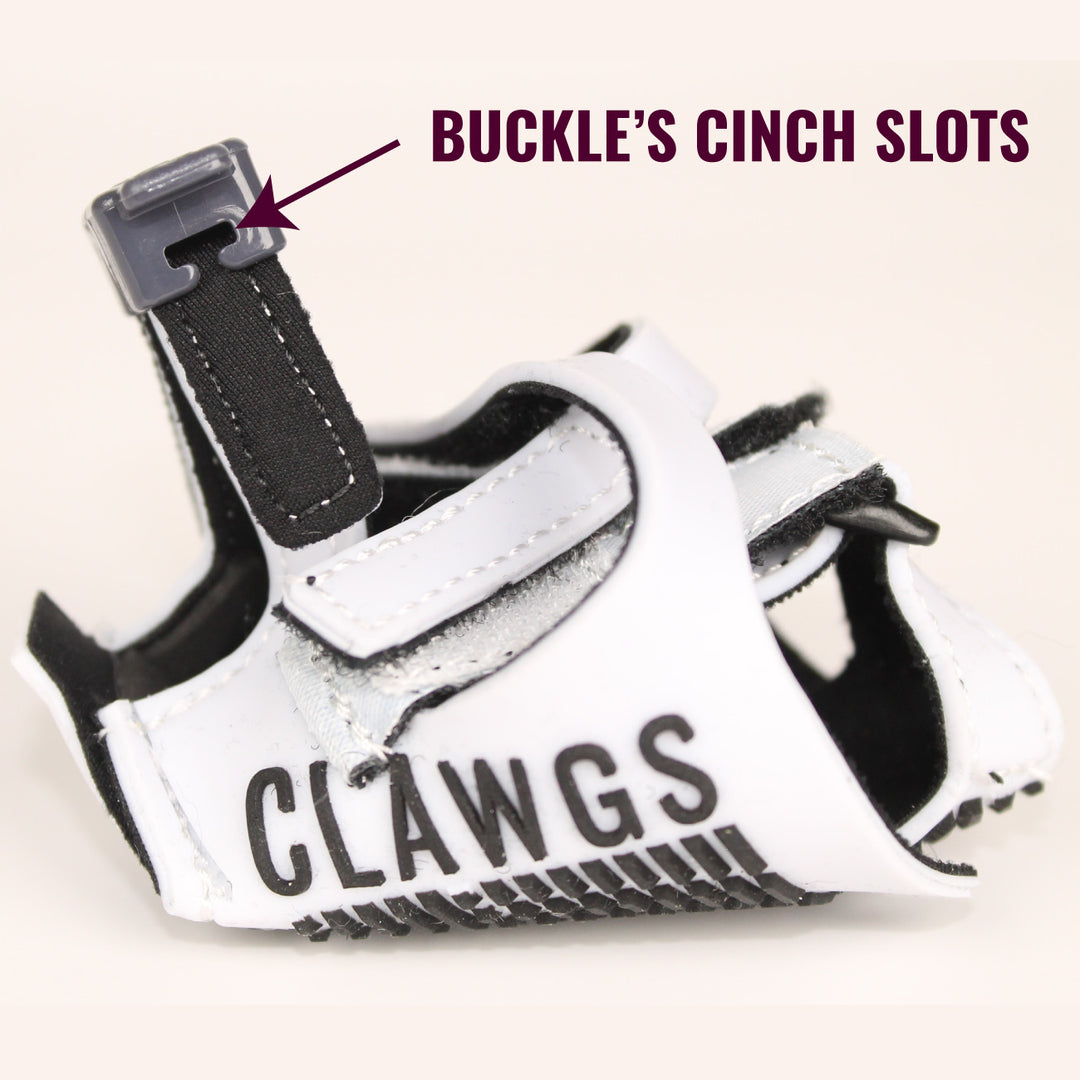
Lock Heel Straps In The Buckles' Cinch Slots
It is critical to secure heel straps in cinch slots. Failure to do so results in lots of problems, including Clawgs falling off or rotating off center.
KEEPING CLAWGS ON PAWS:
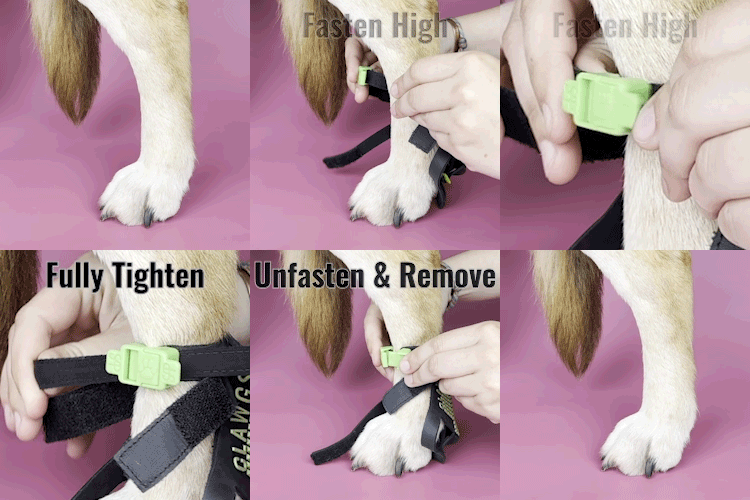
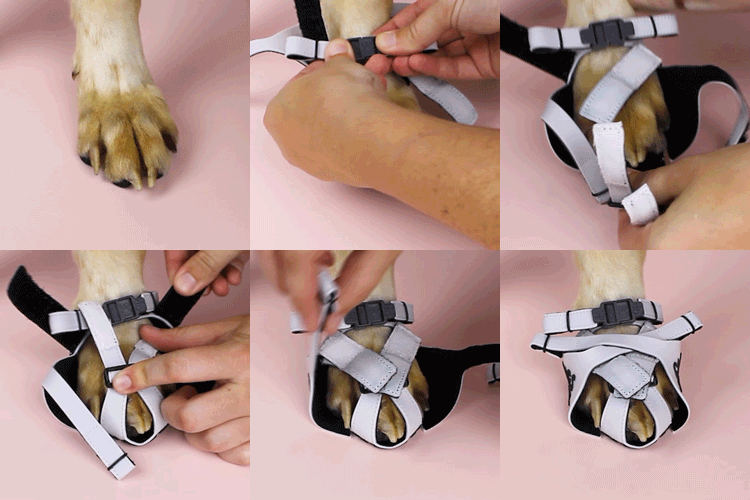
After fastening the buckle and fully tightening the heel straps around paws for the first time, immediately unfasten the buckle and remove the Clawgs from paws.
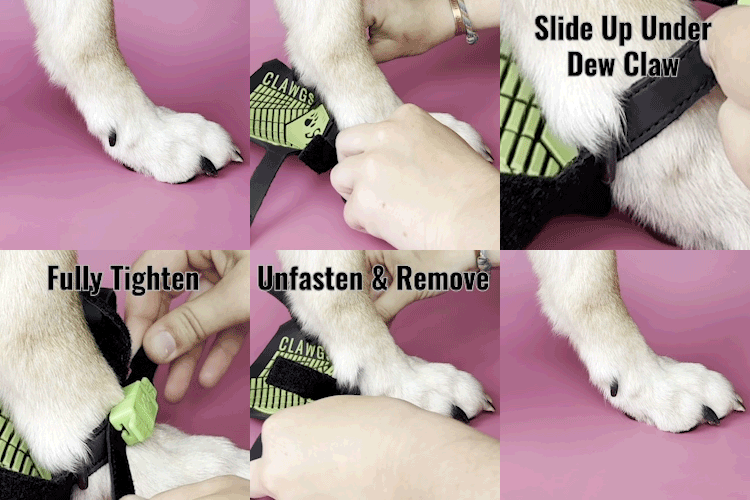
Although you're excited to put Clawgs on, it's critical to take them off and lock the heel straps in place.
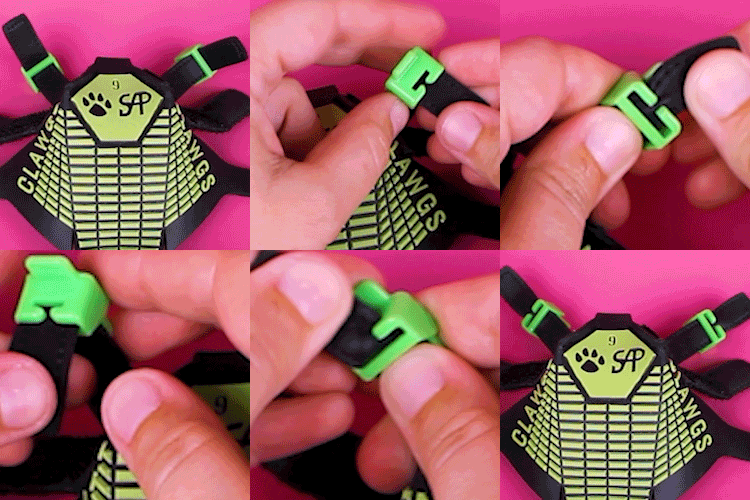
IMPORTANT:
Secure the heel straps into the buckles' cinch slots, as shown above.
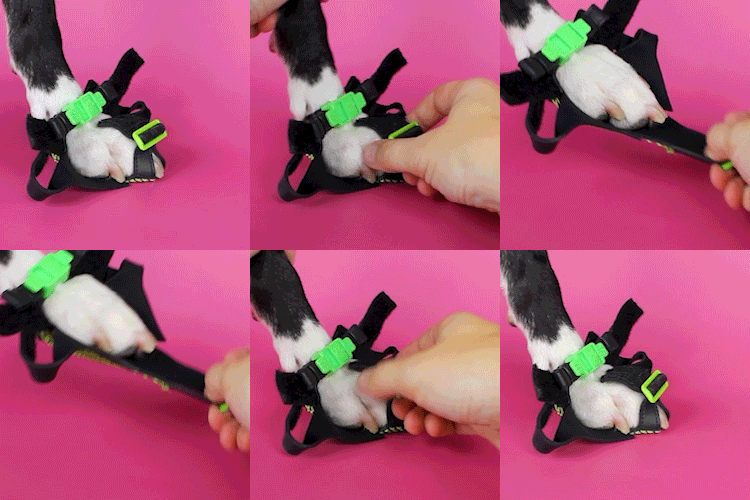
When the heel straps are fully tightened around a paw AND secured in the buckles' cinch slots, they stay on paws , even with the toe straps unfastened.
KEEPING CLAWGS CENTERED ON PAWS:
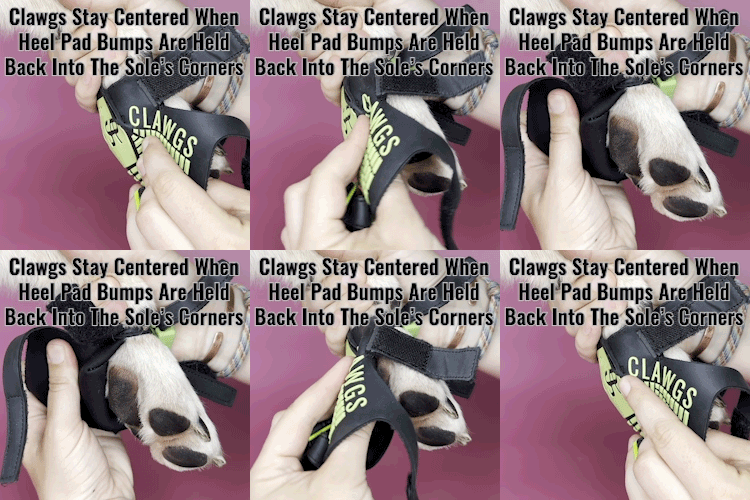
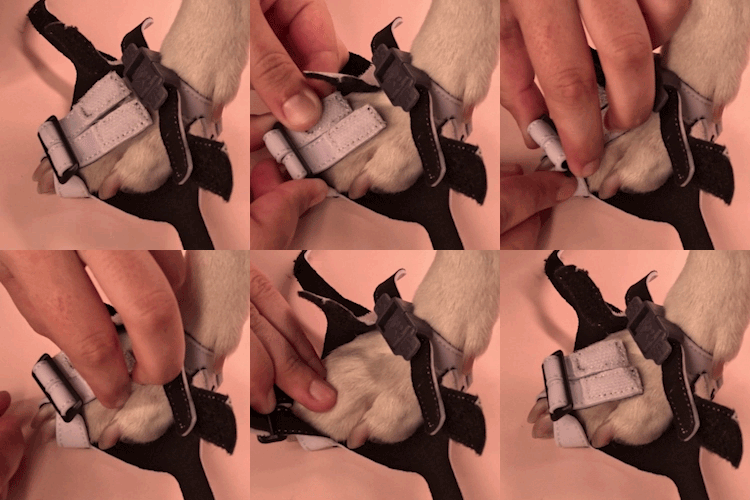
Set dogs' heels into Clawgs' heels by making Clawgs tight on paws from front to back.
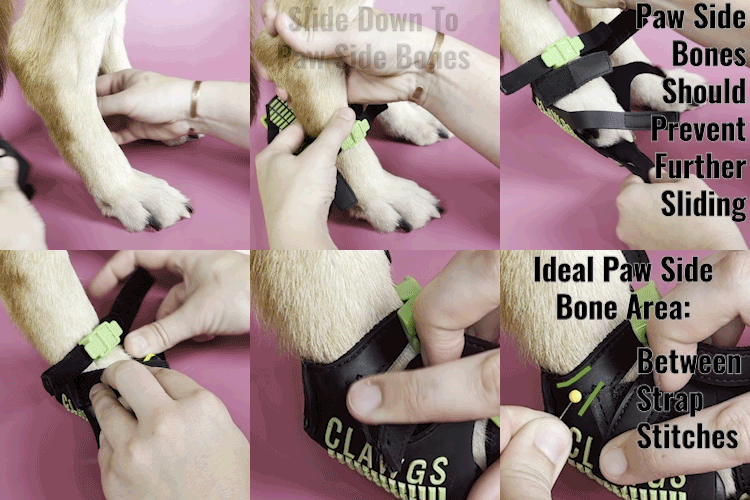
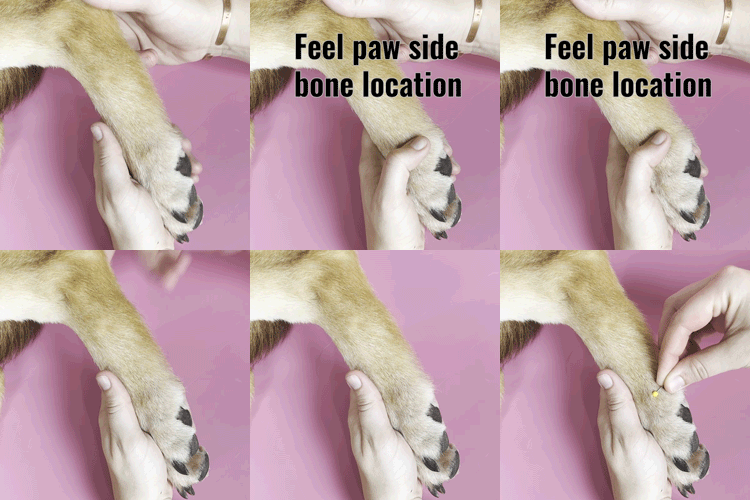
Feel the paw side bones to ensure Clawgs' heels are pulled down to the correct spot - between the strap stitches.
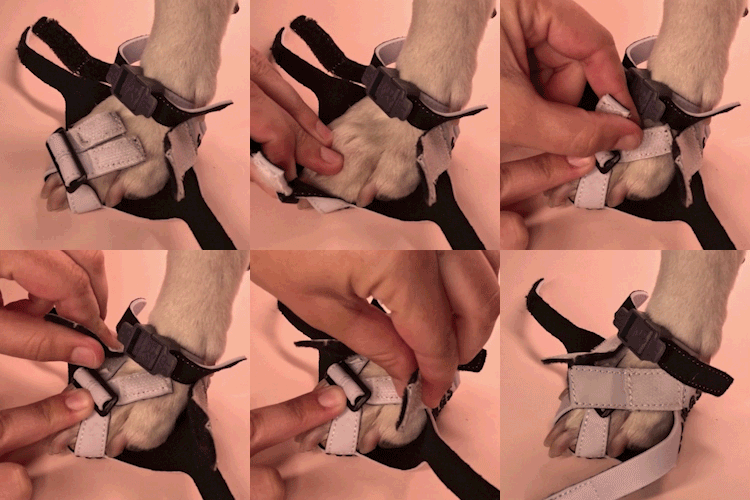
IMPORTANT:
Press and hold the slider against front knuckles with one hand while angling the front straps toward the top straps and fastening the top straps to the front straps as tight as possible while the dog is standing.
KEEPING PAWS COMFORTABLE IN CLAWGS:
DO NOT OVERTIGHTEN THE SIDE STRAPS!
- Dogs hate their toes being squeezed from the sides.
- The side straps main purpose is to prevent debris from entering Clawgs.
- The side straps DO NOT keep Clawgs on or centered.
- The side strap stretchiness is intended to let toes spread, not squeeze them together.
- It is better to leave the side straps way too loose rather than slightly too tight.
- If your dog is uncomfortable in Clawgs with loose side straps while your dog is standing, then your Clawgs are most likely too small.
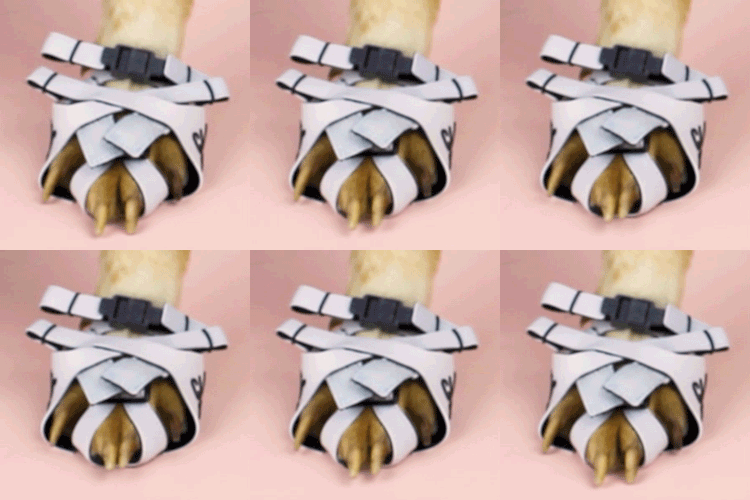
Toes spread when dogs stand. If you're fastening the side straps on a lying down dog or lifted paw, loosely fasten the side straps to account for standing toe spread.
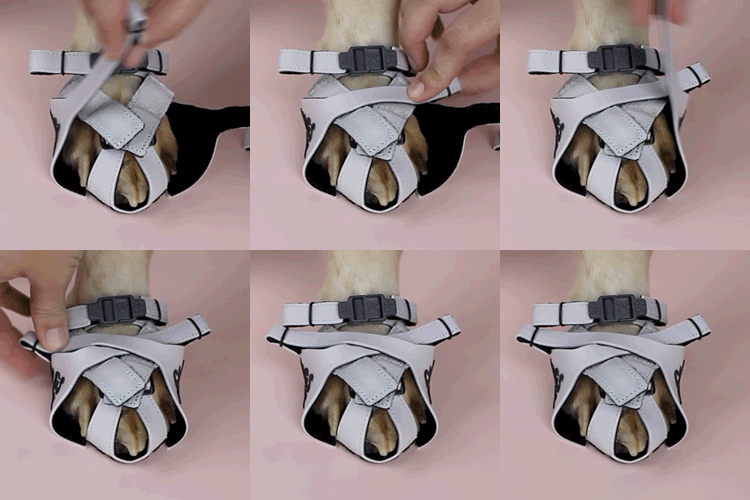
It's best to fasten the side straps while dogs are standing. At most, Clawgs' sides should gently touch side toes. There should not be pressure on side toes.
ASSESSING CLAWGS' FIT ON PAWS:
ALWAYS ASSESS SIZES AND ADJUSTMENTS
WHILE DOGS ARE STANDING.
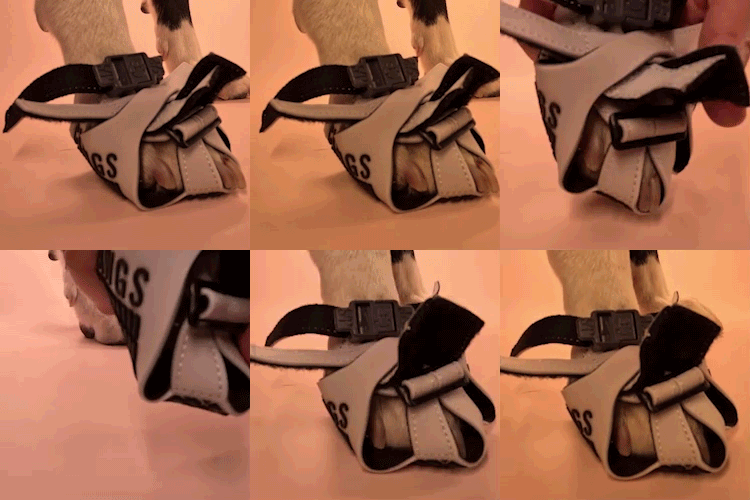
Toes and claws spread when dogs stand. Toes and claws recede into Clawgs on limp and lifted or laying paws. When fastening the Velcro toe straps on lying down dogs, leave the toe straps a bit loose. Then, assess and adjust (unfasten and refasten) the Velcro toe straps when your dog stands.
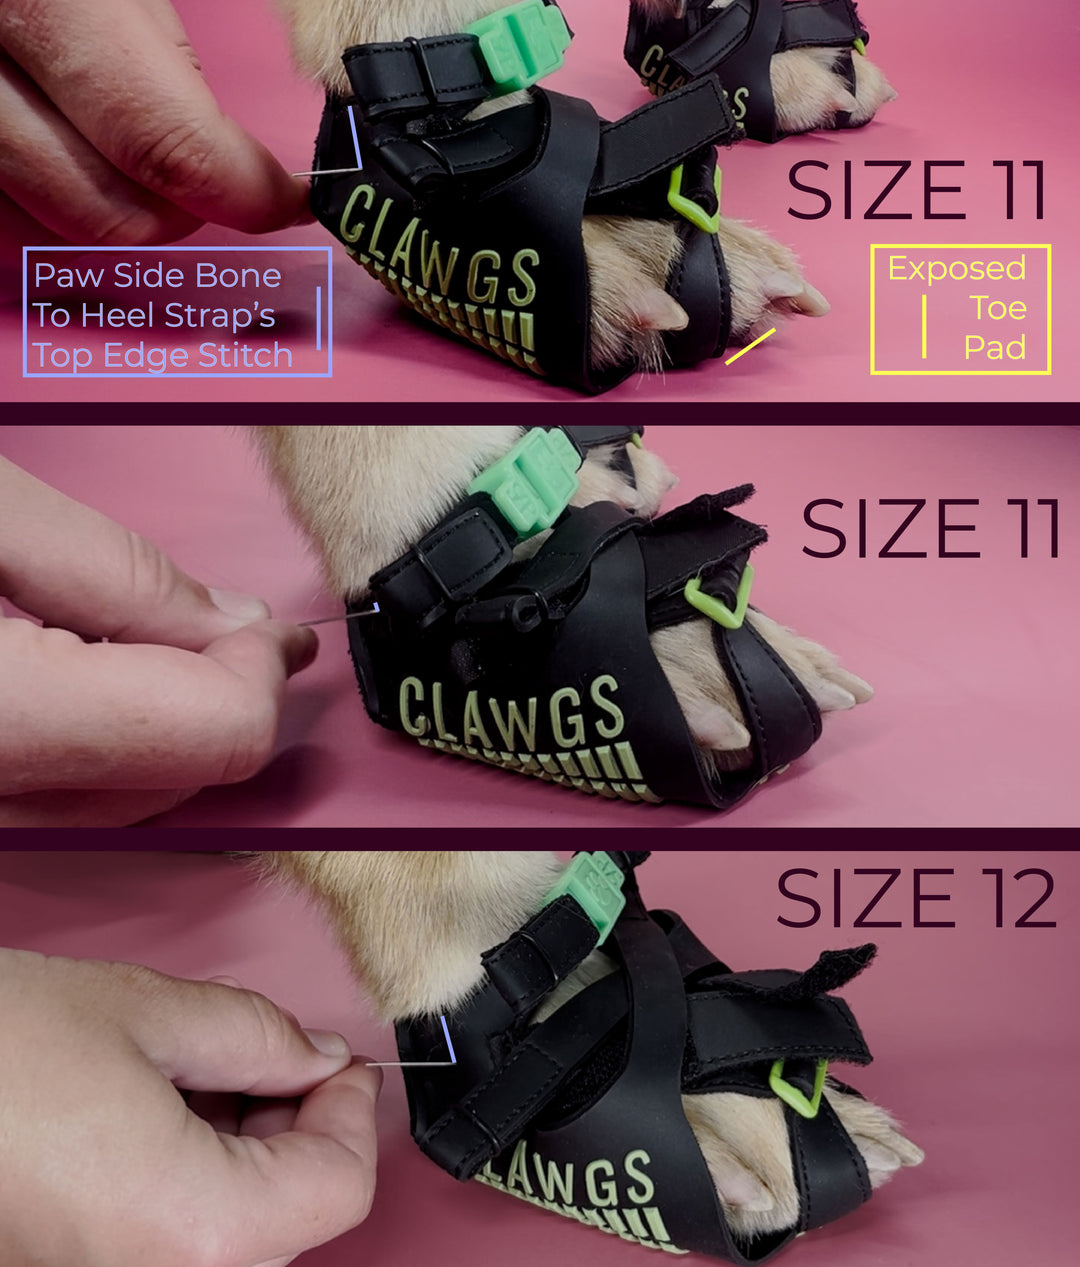
The paw side bones' location directly impacts the front edge's location.
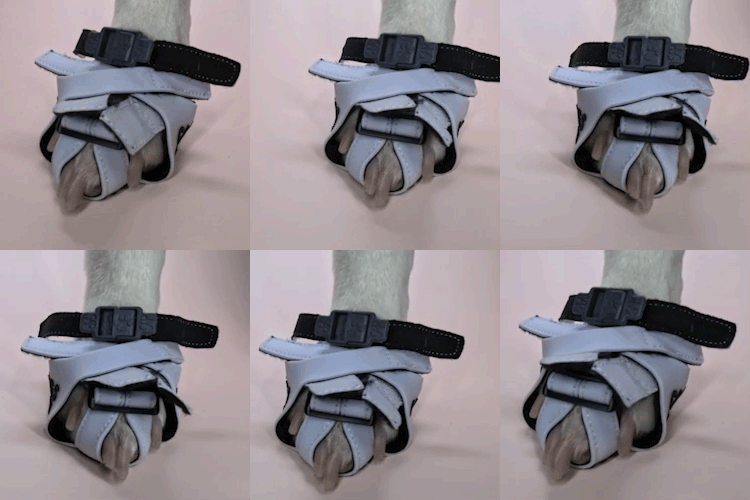
It is normal for one or both side claws to touch or hover above the sole rather than the ground.
There is lots of variation between side toes' location with respect to front toes' location from dog to dog.
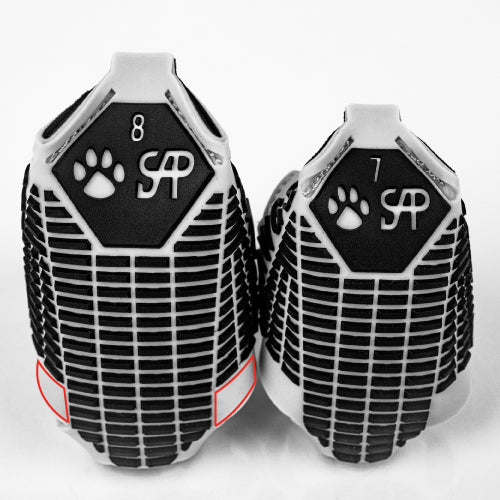
The sole is extended under side toes & claws out of an abundance of caution.
In most situations, it is better for a side claw to touch the sole than a side toe pad to touch the ground.


